


本地部署DeepSeek最大的意义就在于能够利用它来搭建本地知识库,这样可以帮助用户更高效地管理与检索本地文档、数据乃至各类知识资源。本文就以七牛云主机为例,为大家详细介绍一下借助DeepSeek-R1大模型推理能力来快速搭建本地专属知识库教程。
一、购买并配置七牛云主机
七牛云主机是七牛面向用户提供的可弹性伸缩的计算服务,帮助用户在短时间内快速启动任意数量的云主机并即时部署应用程序。通过云主机服务,用户只需要根据业务发展需要创建相应规模的虚拟机实例、云硬盘和网络服务,再也无需提前采购相关资源,缩短了业务部署上线的周期,同时大大降低了企业的运维成本。
七牛云主机目前提供丰富的配置方案可选,包括通用型、计算型、内存型、大数据型、GPU型等多种机型,其中GPU型热推GPU计算型GN7i、GPU计算型GN6e两款机型,也是Deepseek推荐配置,价格低至13637.25元/月。
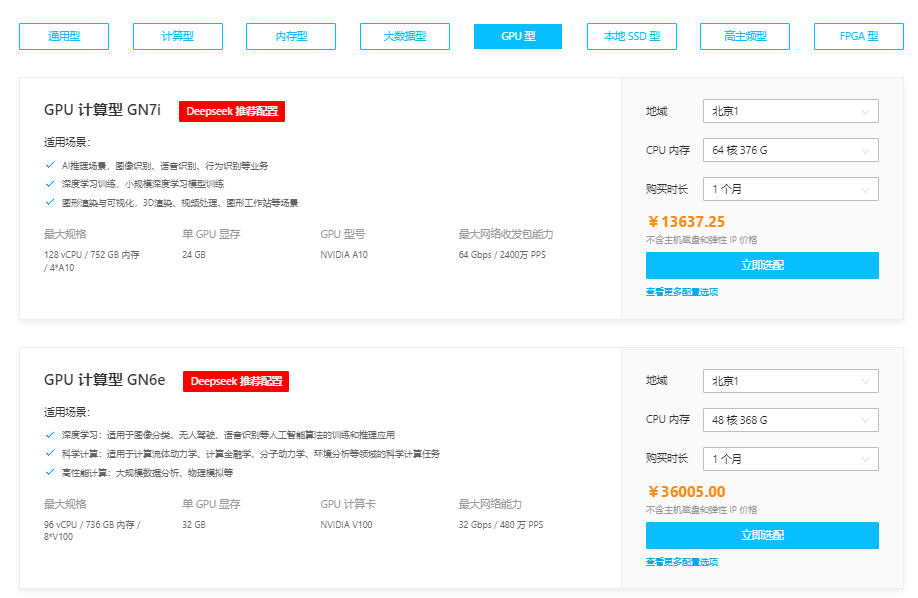
《点击进入官网选购》
1、进入七牛云官网,点击“注册”,并完成实名认证。
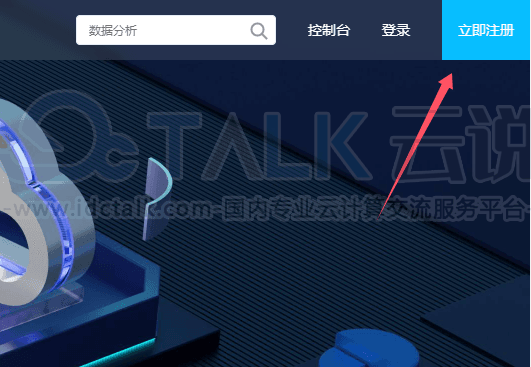
2、完成以后,登录账号。
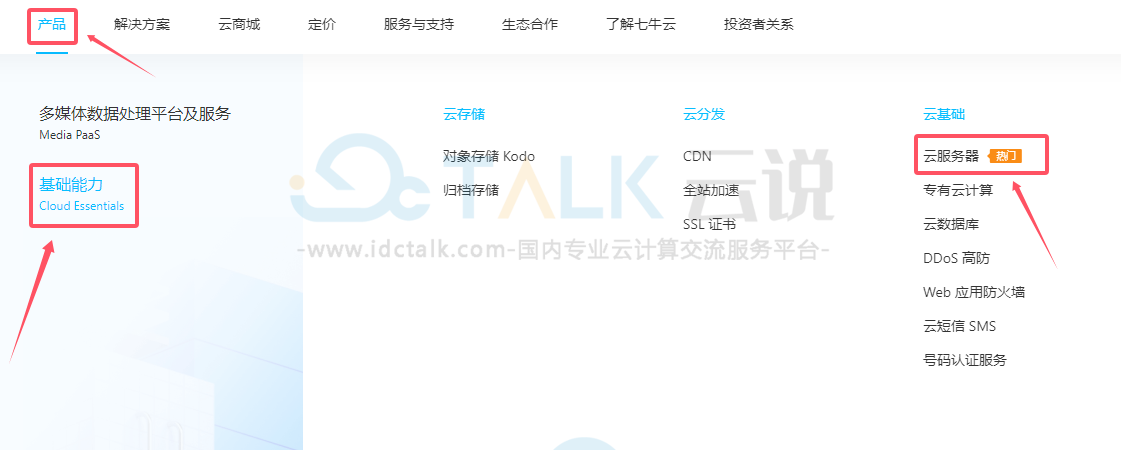
3、选择“产品”>“基础能力”>“云服务器”。
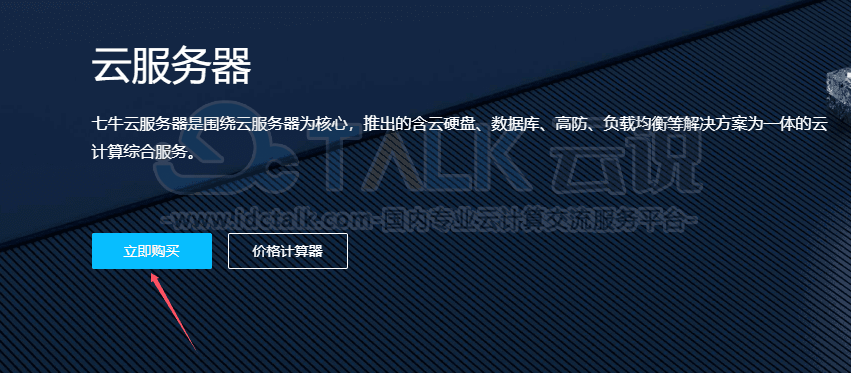
4、在以下界面点击“立即购买”。
5、根据用户自身需求选择合适的地域与可用区、实例规格、实例镜像等配置信息,确认无误后提交订单支付即可。
二、部署DeepSeek-R1和Open WebUI
1、Docker镜像一键部署:Open WebUI+DeepSeek-R1模型。
# 启动镜像 将会从指定服务器中下载镜像 并运行一个容器 在浏览器地址栏输入:8000即可访问到open-webui的网页界面
# 初次运行容器时 需要等待模型下载完毕后 才能开始正常对话
# 7B模型
docker run --gpus all -p 8000:8080 -it registry-aigc.qiniu.io/miku-aigc/deepseek7b_ollama_lite_openwebui:0.2.0

# 8B模型
docker run --gpus all -p 8000:8080 -it registry-aigc.qiniu.io/miku-aigc/deepseek8b_ollama_lite_openwebui:0.2.0

# 14B模型
docker run --gpus all -p 8000:8080 -it registry-aigc.qiniu.io/miku-aigc/deepseek14b_ollama_lite_openwebui:0.2.0

# 32B模型
docker run --gpus all -p 8000:8080 -it registry-aigc.qiniu.io/miku-aigc/deepseek32b_ollama_lite_openwebui:0.2.0

# 70B模型
docker run --gpus all -p 8000:8080 -it registry-aigc.qiniu.io/miku-aigc/deepseek70b_ollama_lite_openwebui:0.2.0
2、手动安装:先部署DeepSeek-R1模型,后启动Open WebUI服务。
a.部署DeepSeek模型服务Ollama或Vllm。
- Ollama部署方式
# 1. 安装ollama
curl -fsSL https://ollama.com/install.sh | sh
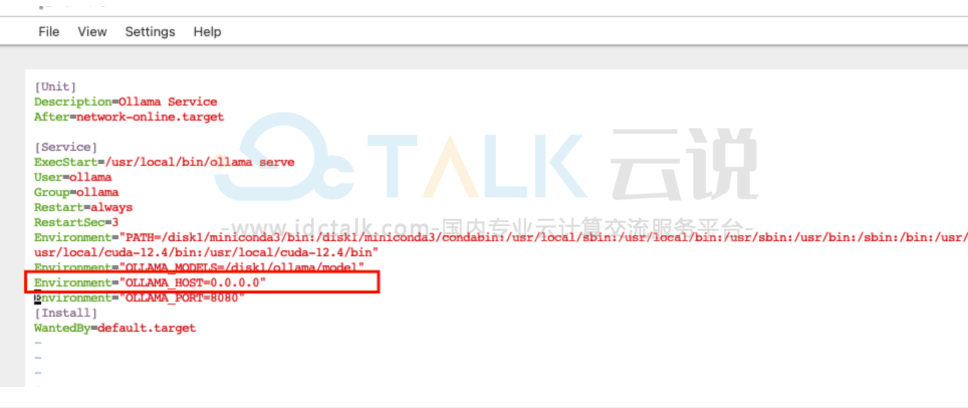
# 2. 配置ollama ip为广播地址 (如下图所示)
vim /etc/systemd/system/ollama.service
Environment="OLLAMA_HOST=0.0.0.0"
# 3.运行模型,以14b蒸馏模型为例,也可以其他32b、70b...模型
ollama run deepseek-r1:14b or ollama run deepseek-r1:32b
- Vllm部署方式
# 安装vllm
pip install vllm

# 运行模型:
# --api-key参数为服务访问所需的密钥,后续会用到
# --tensor-parallel-size 参数和单机所使用的显卡数保持一致
vllm serve deepseek-ai/DeepSeek-R1-Distill-Qwen-14B --tensor-parallel-size 2 --max-model-len 32768 --enforce-eager --api-key deepseek-d-14b

# 报错解决
# 如果设备不支持bf16数据格式,需要改成fp16,添加–dtype=half 参数
b.启动Open WebUI
# 安装open-webui
pip install open-webui

# 启动open-webui
open-webui serve
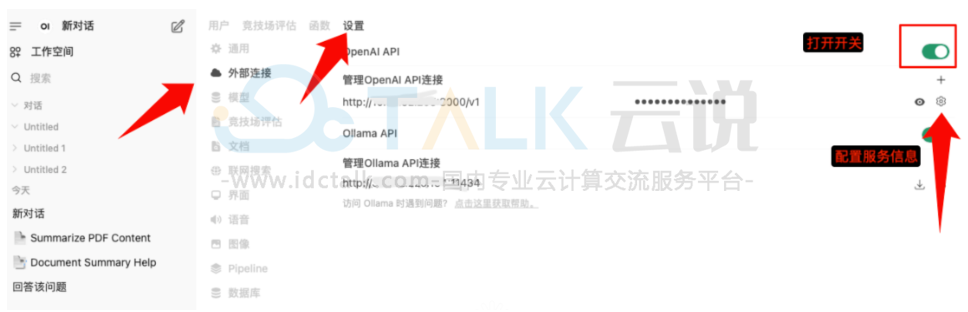
浏览器输入<IP>:<PORT>,进入注册页面,注册管理员账户并登陆;其次,配置模型(需以管理员账户登陆),再打开配置面板:

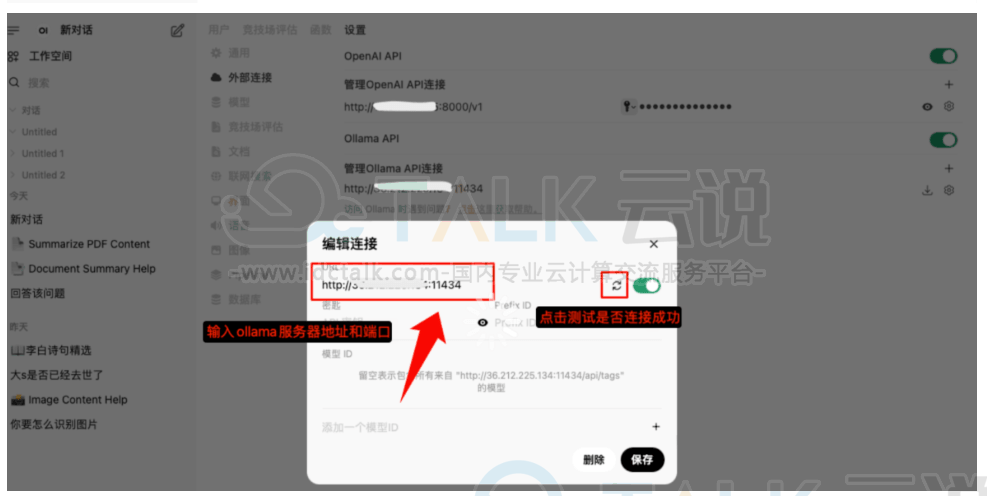
c.Open WebUI配置DeepSeek-R1模型
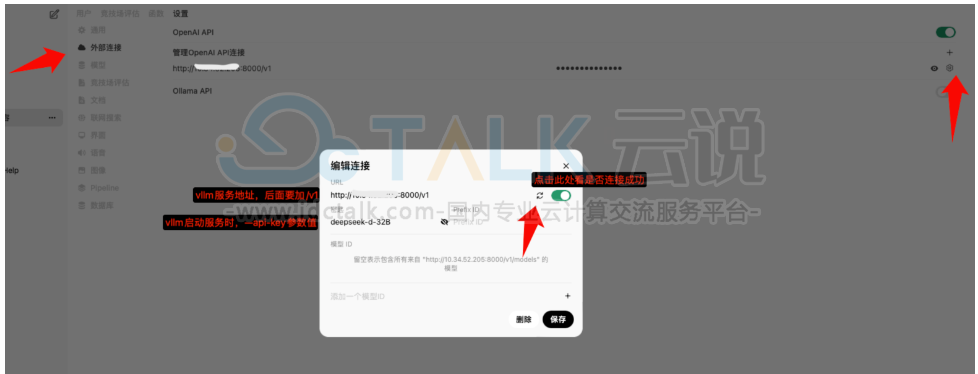
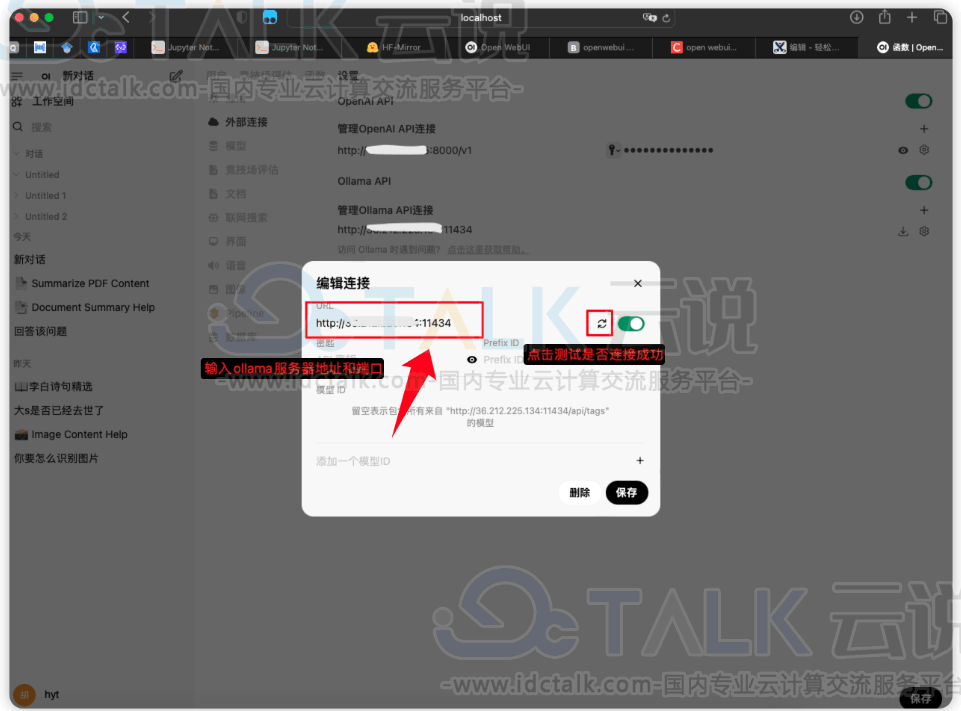
根据部署的服务为Ollama还是Vllm,选择相应的配置方式
配置Ollama模型

配置Vllm模型
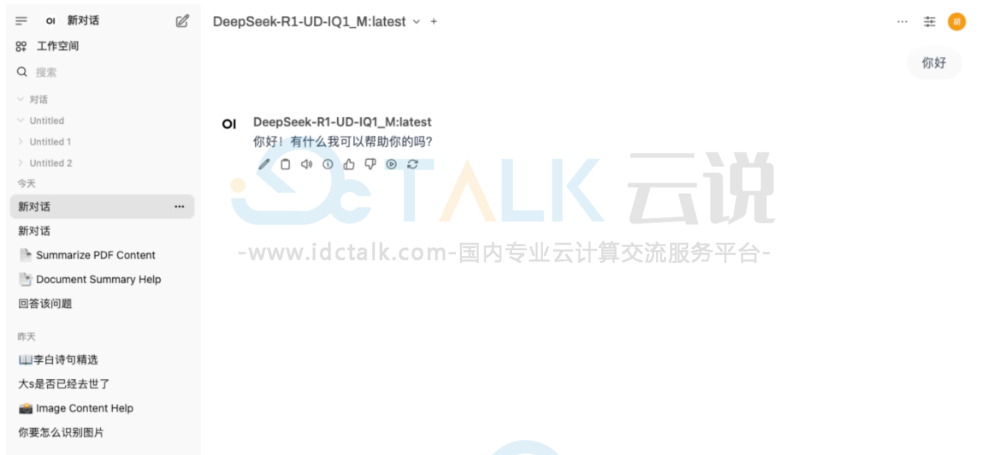
3、进行对话
Docker一键部署或手动安装后,可以通过Open WebUI提供的Web客户端直接访问达模型,进行推理,对话。
三、通过DeepSeek-R1搭建知识库
可以通过Open WebUI提供的Web客户端,也可以通过API方式使用。
基于Web客户端
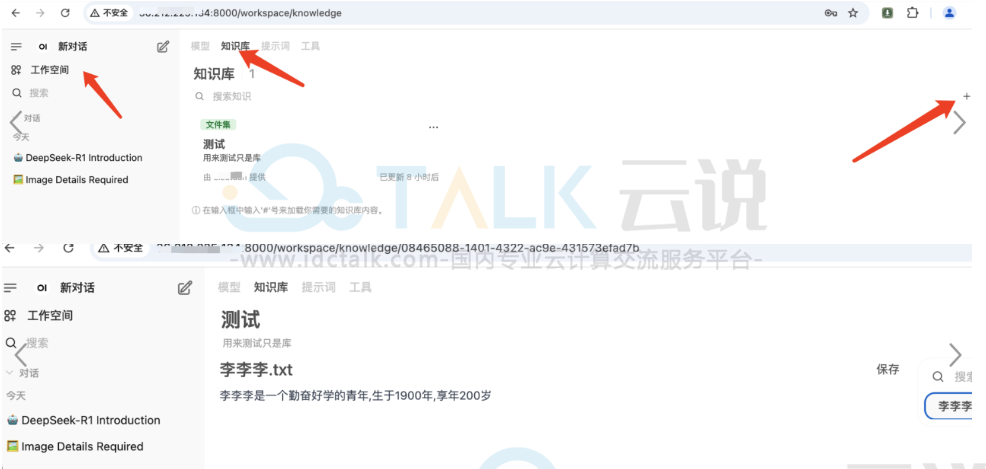
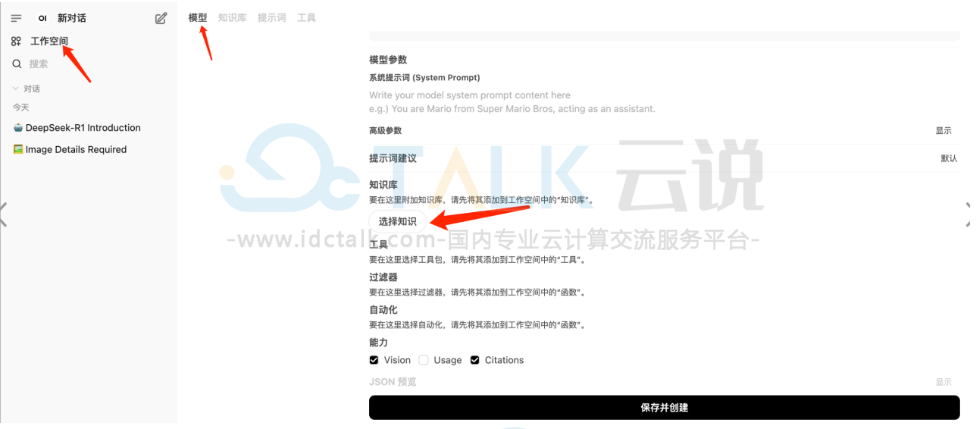
1、添加知识库
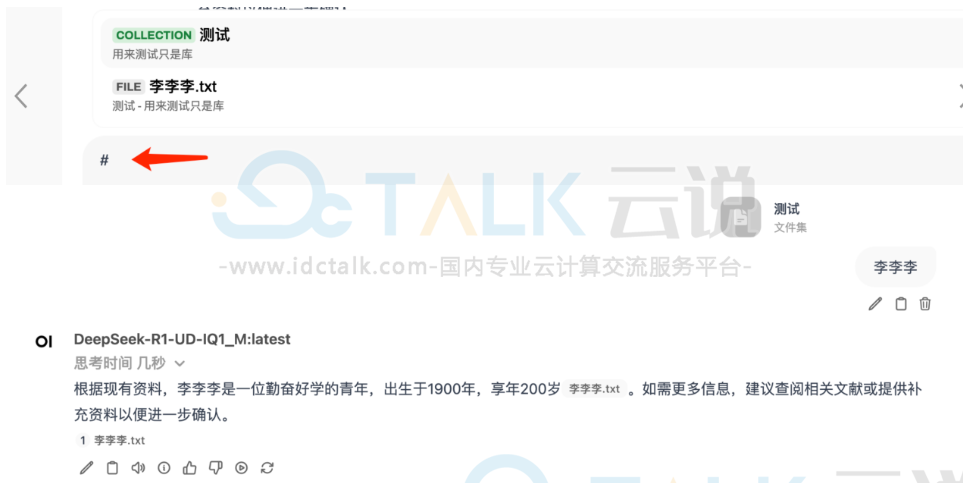
2、使用知识库
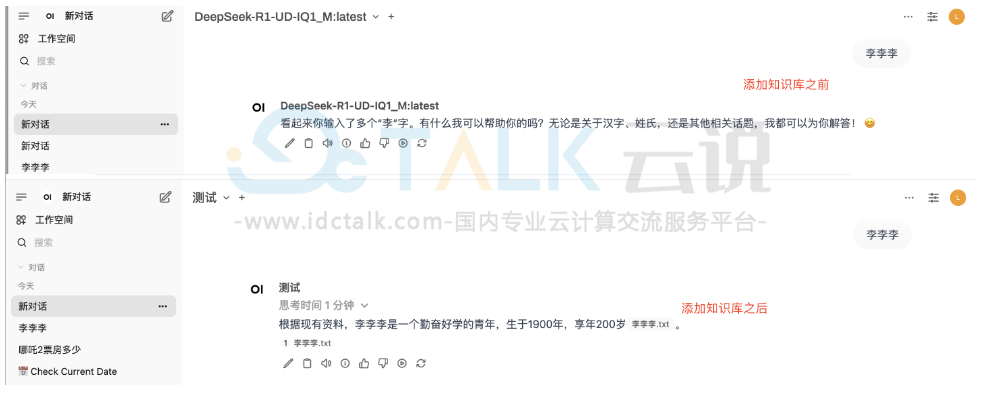
用#使用对应知识库,再输入需要提问的信息
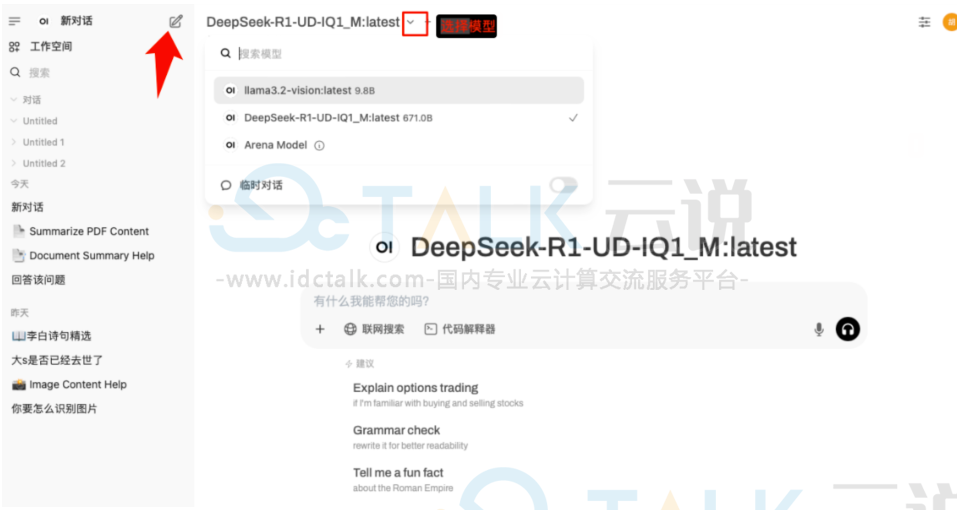
新增一个绑定了知识库的模型,然后在使用时,选择对应的模型,再进行提问

添加知识库前后对比如下:
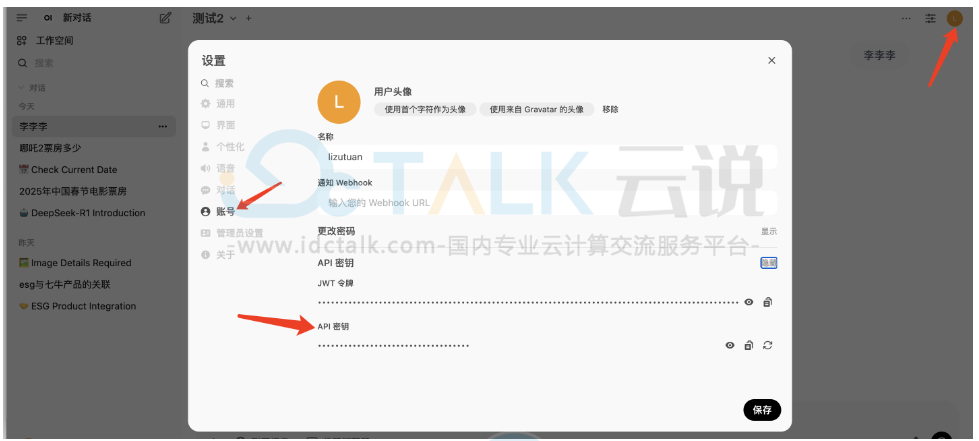
API方式
为了确保安全访问API,需要进行身份验证,从Open WebUI中的“设置”>“帐户”获取用户的API密钥,或者使用JWT(JSON Web Token)进行身份验证。
1、获取通过Open WebUI创建或添加的所有模型。
# YOUR_API_KEY 填写上面查到的API密钥
# localhost:8000 其中localhost改为对应的ip地址,8000改为对应的端口号
curl -H "Authorization: Bearer YOUR_API_KEY" http://localhost:8000/api/models

2、发起聊天。
curl -X POST http://localhost:8000/api/chat/completions \
-H "Authorization: Bearer YOUR_API_KEY" \
-H "Content-Type: application/json" \
-d '{
      "model": "DeepSeek-R1-UD-IQ1_M:latest",
      "messages": [
        {
          "role": "user",
          "content": "你是谁?"
        }
      ]
    }'
3、添加知识库。
# 1.创建知识库并记录返回的知识库ID,记为{knowledge_id}
curl -X POST http://localhost:8000/api/v1/knowledge/create \
-H "Authorization: Bearer Bearer YOUR_API_KEY" \
-H "Content-Type: application/json" \
-d '{
        "name": "API知识库",
        "description": "通过API创建"
    }'

# 2.上传外部数据文件并记录返回的文件ID
curl -X POST -H "Authorization: Bearer YOUR_API_KEY" -H "Accept: application/json" \
-F "file=@/path/to/your/file" http://localhost:8000/api/v1/files/

# 3.将文件添加进知识库,用到第1步中的{knowledge_id}和第2中返回的文件ID
curl -X POST http://localhost:8000/api/v1/knowledge/{knowledge_id}/file/add \
-H "Authorization: Bearer YOUR_API_KEY" \
-H "Content-Type: application/json" \
-d '{"file_id": "your-file-id-here"}'
4、根据单个文件或者知识库进行聊天。
# 1.查询利用单个文件来增强响应,需要用到上一步中的文件ID
curl -X POST http://localhost:8000/api/chat/completions \
-H "Authorization: Bearer YOUR_API_KEY" \
-H "Content-Type: application/json" \
-d '{
      "model": "DeepSeek-R1-UD-IQ1_M:latest",
      "messages": [
        {"role": "user", "content": "你是谁."}
      ],
      "files": [
        {"type": "file", "id": "your-file-id-here"}
      ]
    }'

# 2.查询利用知识集合来增强响应,需要用到上一步中的知识库ID
curl -X POST http://localhost:8000/api/chat/completions \
-H "Authorization: Bearer YOUR_API_KEY" \
-H "Content-Type: application/json" \
-d '{
      "model": "DeepSeek-R1-UD-IQ1_M:latest",
      "messages": [
        {"role": "user", "content": "你是谁."}
      ],
      "files": [
        {"type": "collection", "id": "{knowledge_id}"}
      ]
    }'
相关推荐:
《七牛云主机怎么样》